
Kings Rotary Tattoo Machine
Design Goal: Design a rotary tattoo machine that is lightweight, comfortable, and maintains a high-bar hit rate.


Ideation Sketches
Ideation sketches began by taking inspiration from my mood board. The goal was to design something simple yet luxurious. The art of tattooing is very intimate, a connection between the artist and the client. The design of the machine must balance intimacy and comfort, as well as precision, as it is considered a medical device.


Ideation Sketches (Cont.)
After initial ideation, I landed upon four different styles of rotary tattoo machines. Two cylindrical machines, and two machines with more unique forms. After considering the ergonomics, and wanting the user to be comfortable with either right or left-hand proficiency, the ideal machine needed to be cylindrical.
Ideation Sketches (Cont.)
With more consideration of form factors, a final design with a quick colorway was created before further ideation and refinement in Autodesk Fusion 360.


CAD Ideation
From left to right, basic CAD models with slightly different forms were created, with the first model being a recreation of the final sketches. The iterations experimented with a multitude of grips, diameters, and curves.
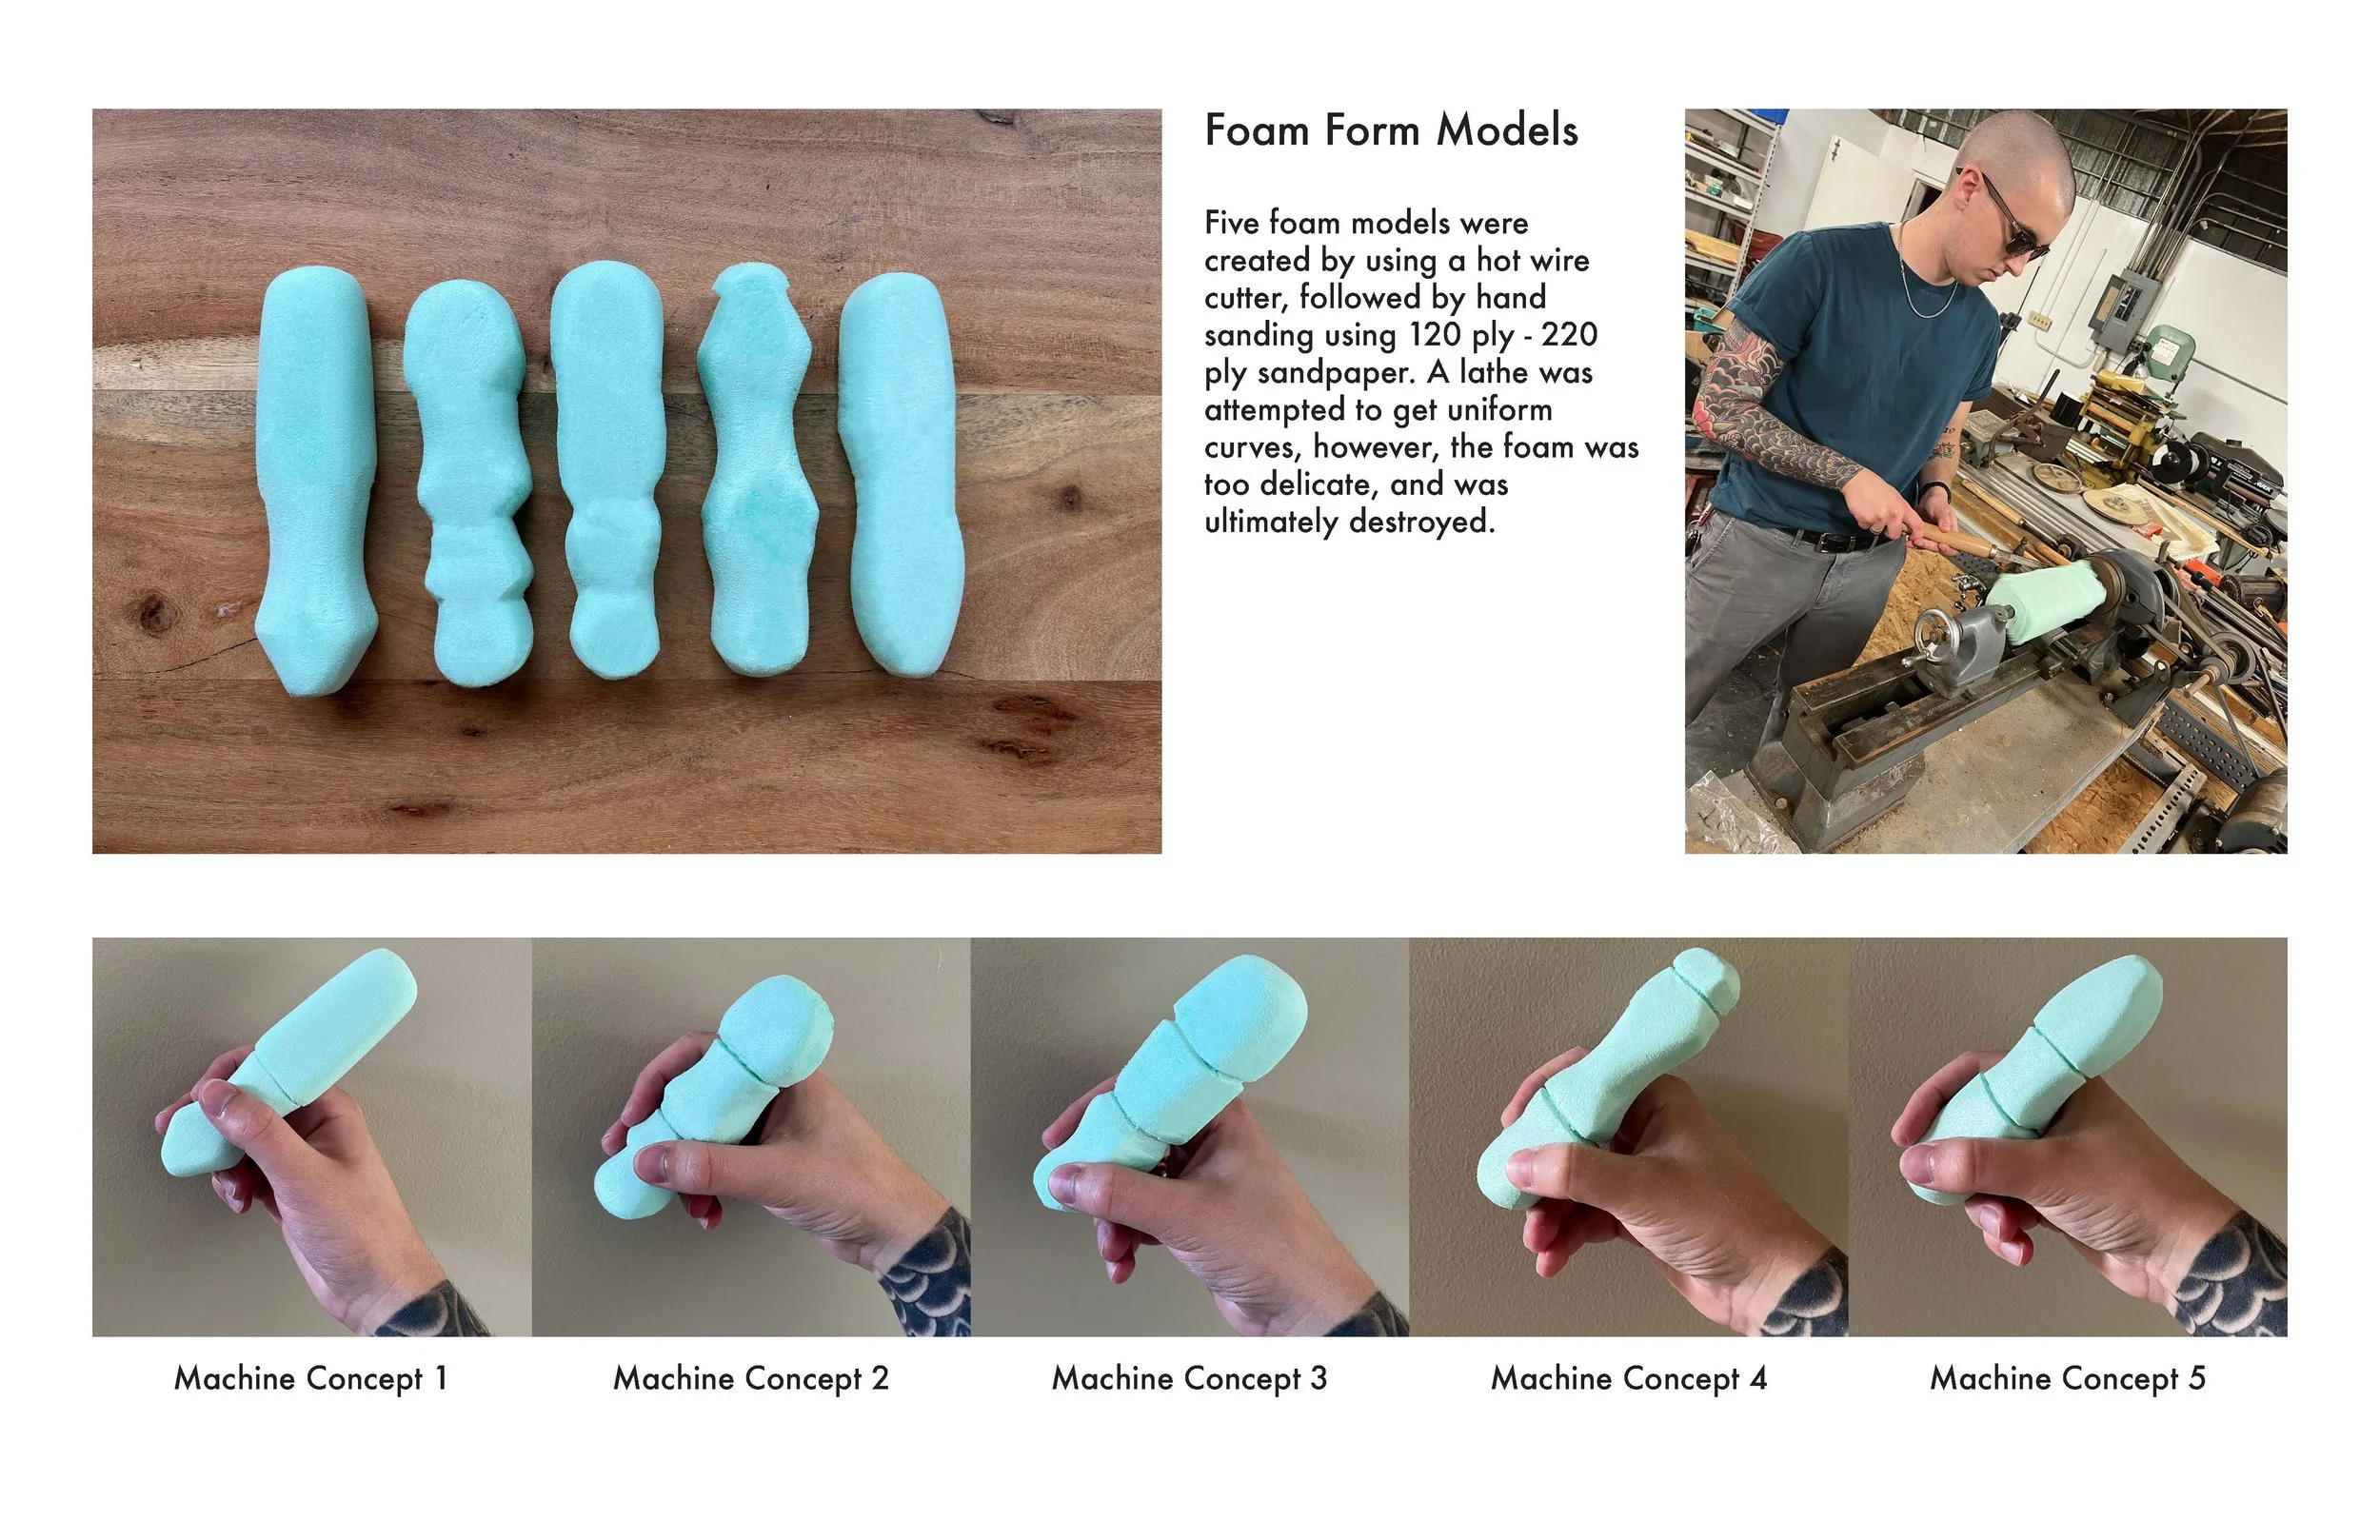
Foam Form Models
From CAD ideation, five different foam models were created by using hot wire cutters, and 120-220 ply sandpaper. A lathe was attempted to get uniform curvature, yet the foam was too delicate, and ultimately destroyed.
Keyshot Color Ideation
“Machine Concept 1” was the most successful design landed upon. A wide variety of individuals both right and left-handed experienced the most comfort with the first concept. Different colorways were experimented with in Keyshot. With the goal of a simple yet elegant design, a dark color with tasteful accents was the most successful to begin with. Rings were added to the grip to pay homage to traditional coil tattoo machine handles shown in the mood board.
3D Model Exploration
Simple to complex 3D prints were created to figure out the correct sizing of the machine, with consideration of internal component measurements. From left to right, the forms become more complex. The final 3D model was coated with varnish and sanded with 220 ply sandpaper, for a premium smooth feel.


Sizing Exploration
Right Hand Use

Left Hand Use

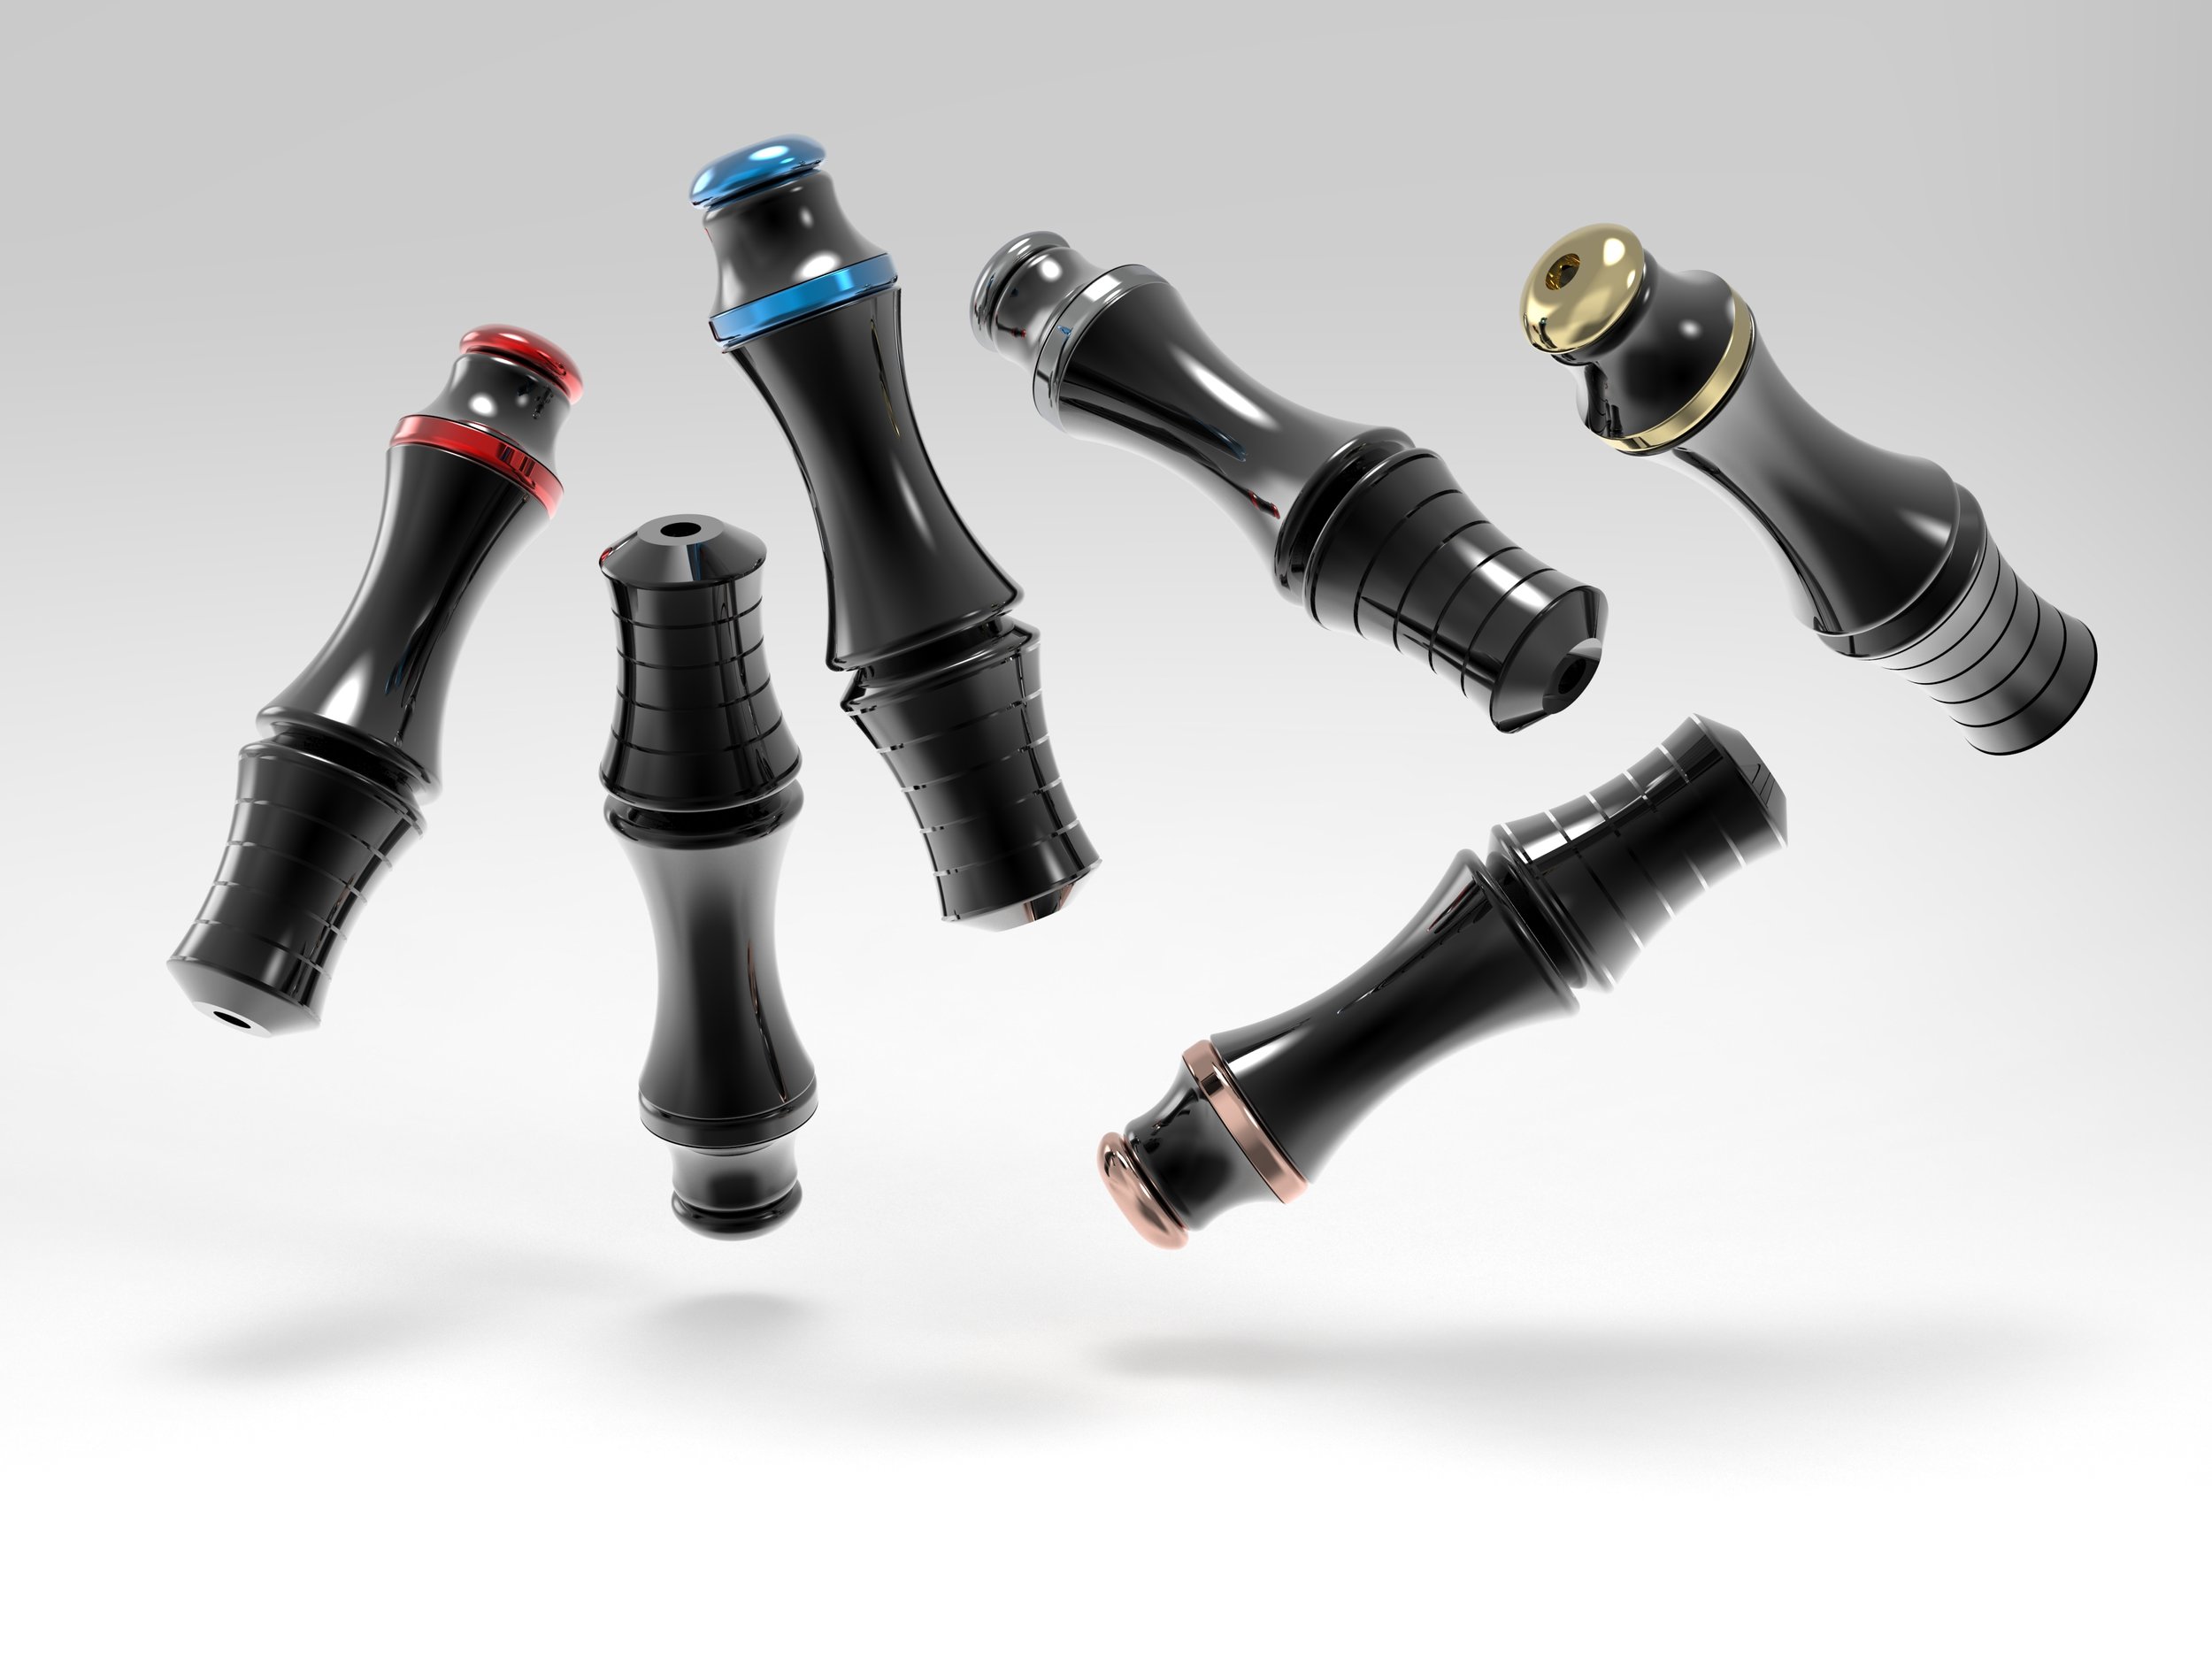
Final Design Direction
A final shell for the tattoo machine was designed. A combination of matte and reflective finishes were applied for a premium, luxurious look and feel. A callback to the mood board is shown with the addition of gems (marketing option) to the top body of the machine. The three colorways were decided upon by mirroring the premium select finishes offered by Apple products. From this step forward, the internal components of the rotary machine were modeled to scale in Autodesk Fusion 360, shown below.
Exploded Views


Exploded Views (Cont.)


In Context Rendering
Shown to the right is a final in-context rendering of myself tattooing my father with the “Kings” Rotary Tattoo Machine. “Kings” was chosen as the product name for the machine’s “chess-like” appearance, agreed upon by the majority of users who interacted with the product.
